
Help

_edited.png)

RichCast Help
Welcome to the RichCast help guide. This page is designed to help explain the features of RichCast and show examples of how to use them. Our Community Managers are on hand in our Discord Server if you need further help.
For an in depth look at creating RichCast titles, check out our Best Practice guides to get you started.

Features
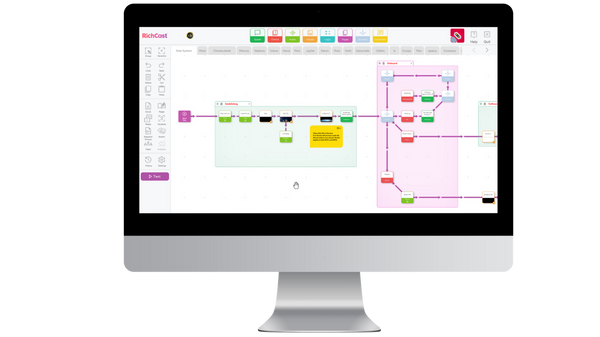
Action Bar


Speak Tiles are used to make your character talk. Simply type in what you want them to say. Alternatively you can upload your own voice clips which will play automatically when the flow reaches that tile.
Choice Tiles give the player an on screen option to choose. All you need to do is type in what you want your choice to be and it will be displayed on screen automatically. The player can interact by pushing the button or by using their voice. Input keywords into your choice tile and RichCast will recognise these words when the player speaks and select that choice. You can change your button's look as well as sound.
Audio Tiles are used to play an audio file such as music, ambiance or just a one off sound effect. There are 5 channels available, which means you can have up to 5 sounds playing at once. You have the option to loop your audio as well as add effects, raise and lower volume, change pitch and fade in and out.
Visual Tiles display your project images or video in your title. You can add multiple layers to your title and automate movement by using 'Start' and 'End'. Your image or video will begin at the start point and automatically move to the end point over the amount of time shown in the bottom left of the tile screen.
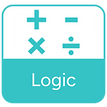
Logic uses 'variables' to give RichCast a memory. For example the player may pick need a key to unlock a door. Using Logic, we can tell RichCast when the player has found the key, and therefore unlock the door.
Pages are used to separate and organise your title into sections. These can be used for locations, interactions or just as a way of keeping your title neat.
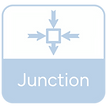
Junctions are a great organisational tool. Use these to help direct your flow and avoid a spaghetti mess!
Comments are used to leave notes in your Title. They can be seen by anyone else collaborating on your project, but are not seen by the player. They can be deleted at any time.
.
Tools Menu
Recentre is a handy tool that automatically takes you back to the start tile of the page you are on, or if you have a tile already selected it will automatically centre your screen around that.
Group allows you to lock a selection of tiles together. The tiles can then be moved as one. Simply select the group icon and highlight your tiles.
Undo will undo the last action you carried out.
Redo automatically reverses your previous action (for example if you delete a tile).
Delete will permanently remove a selected tile (alternatively just hit the delete button on your keyboard).
Cut will cut the selected tile or link.
Copy will copy the selected tile or group, enabling you to paste it elsewhere.
Paste will let you paste your selected tile or group (after using the Copy function).
Script allows you to access the entire script for your title (everything inputted into Speak tiles). In this screen you can search for specific lines or characters as well as locate each line within the project. You can also export your script in spreadsheet format.
Pages opens a menu of your current Title pages, allowing you to browse them as well as create new ones, copy existing ones or delete unused ones.
Media allows you to import video, audio and imagery into your Title.
Variables opens your variable list where you can create new ones and edit or delete existing ones.
Keyword Groups lets you manage the keywords you have grouped in your project.
Actors are AI voices that you can assign to your characters. Access them via the Actors icon on the left of the screen. Each voice can be customised within the Actors panel.
Team allows you to add or remove collaborators on your project, or change the permissions of existing team members.
Analytics brings up statistics on how people are playing your Title.
History lets you restore your project to a previous auto-saved version.
Settings lets you access several project options such as your synopsis, credits, title screen information and also allows you to publish your work.
Shortcut Keys
Undo
Redo
Delete Tile/Link
Cut
Copy
Paste
Actors
Test
Settings
Recentre
Group
Windowed Mode
Ctrl + Z
Ctrl + Y
Delete
Ctrl + X
Ctrl + C
Ctrl + V
Ctrl + A
Ctrl + T
Ctrl + S
Ctrl + R
L Shift + Mouse /R Mouse Button
ALT + Enter.
